THEME SETUP
STEP #1— THEME INSTALLATION
INSTALL WORDPRESS
In start you must have a working version of WordPress already installed. For information in regard to installing the WordPress CMS, please see the WordPress Codex Installing WordPress.
Once you have a working version of WordPress, you need to do the following
- DOWNLOAD the theme files called
vr-files.zip(which contains both the theme and related documents). - EXTRACT the downloaded
vr-files.zipfile. - OPEN the folder called
01- Themeto find the installable theme zip file called vr.zip - INSTALL the theme by uploading vr.zip in your WordPress website.
RECAP
So, it goes like this. You download the theme files you bought, you extract them in your computer and inside the theme folder 01- Theme you find vr.zip file which is the theme file you need to upload in your WordPress.
Install Theme Via WordPress Dashboard
- Access your WordPress site admin area.
- Go to
Appearance > Themessection. - Click
Add Newbutton and select the ‘Upload Theme’ option - Choose the vr.zip file and click
Install Now - Once the theme is uploaded you need to activate it.
Alternative — Install Theme Via FTP
FTP (Alternative)
If you face any problem during upload through dashboard, please upload the theme using FTP as guided below.
- Extract the vr.zip file in your PC.
- Access your hosting server using an FTP client e.g. FileZilla.
- Go to the
wp-content/themesfolder of your WordPress installation. - Upload the
vrfolder (you extracted) to thewp-content/themes/folder. - Go to
WordPress Dashboard > Appearance > Themessection and activate the theme.
STEP #2— PLUGINS INSTALLATION
After activating the theme you need to install the required plugins. These plugins are needed for this theme to work.
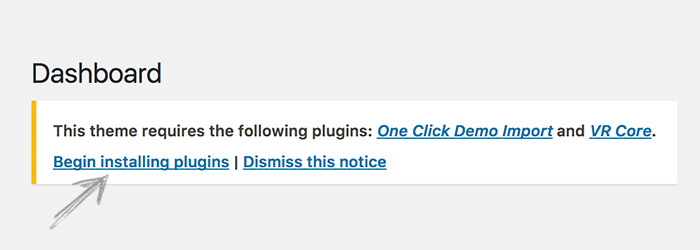
When you install and activate the theme, you will see this notice.

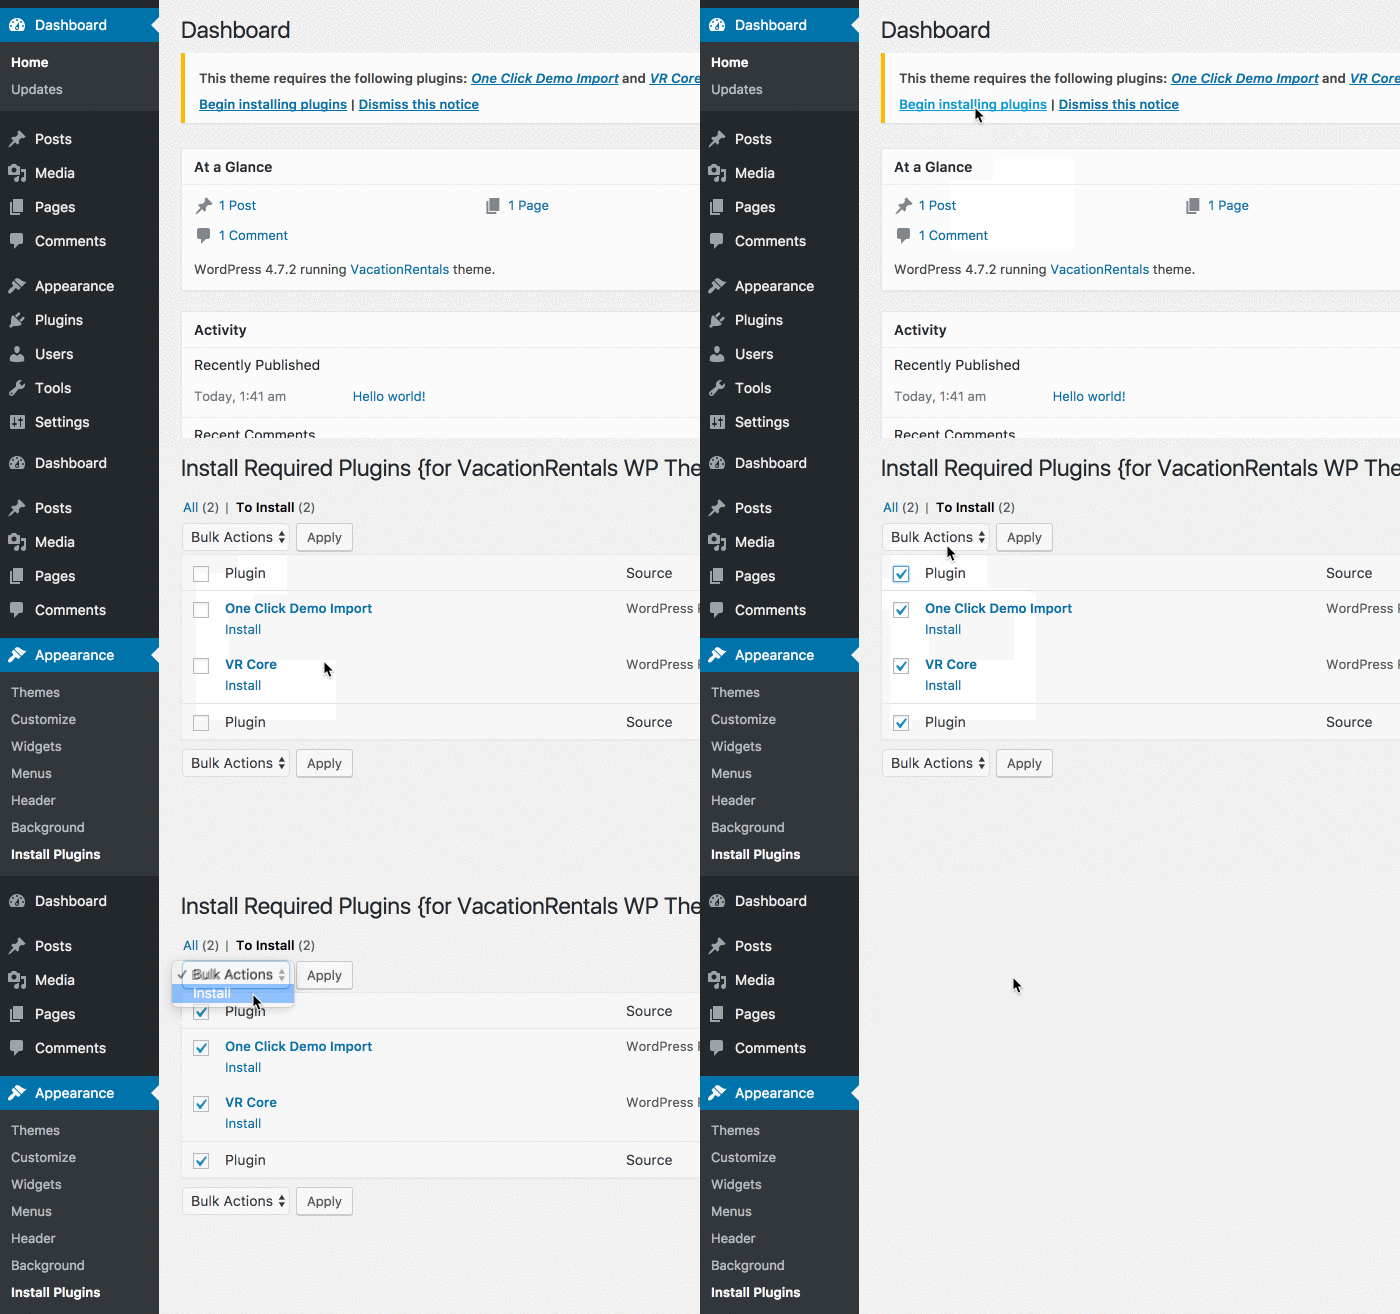
Apply to install the required plugins. As shown in the GIF below.

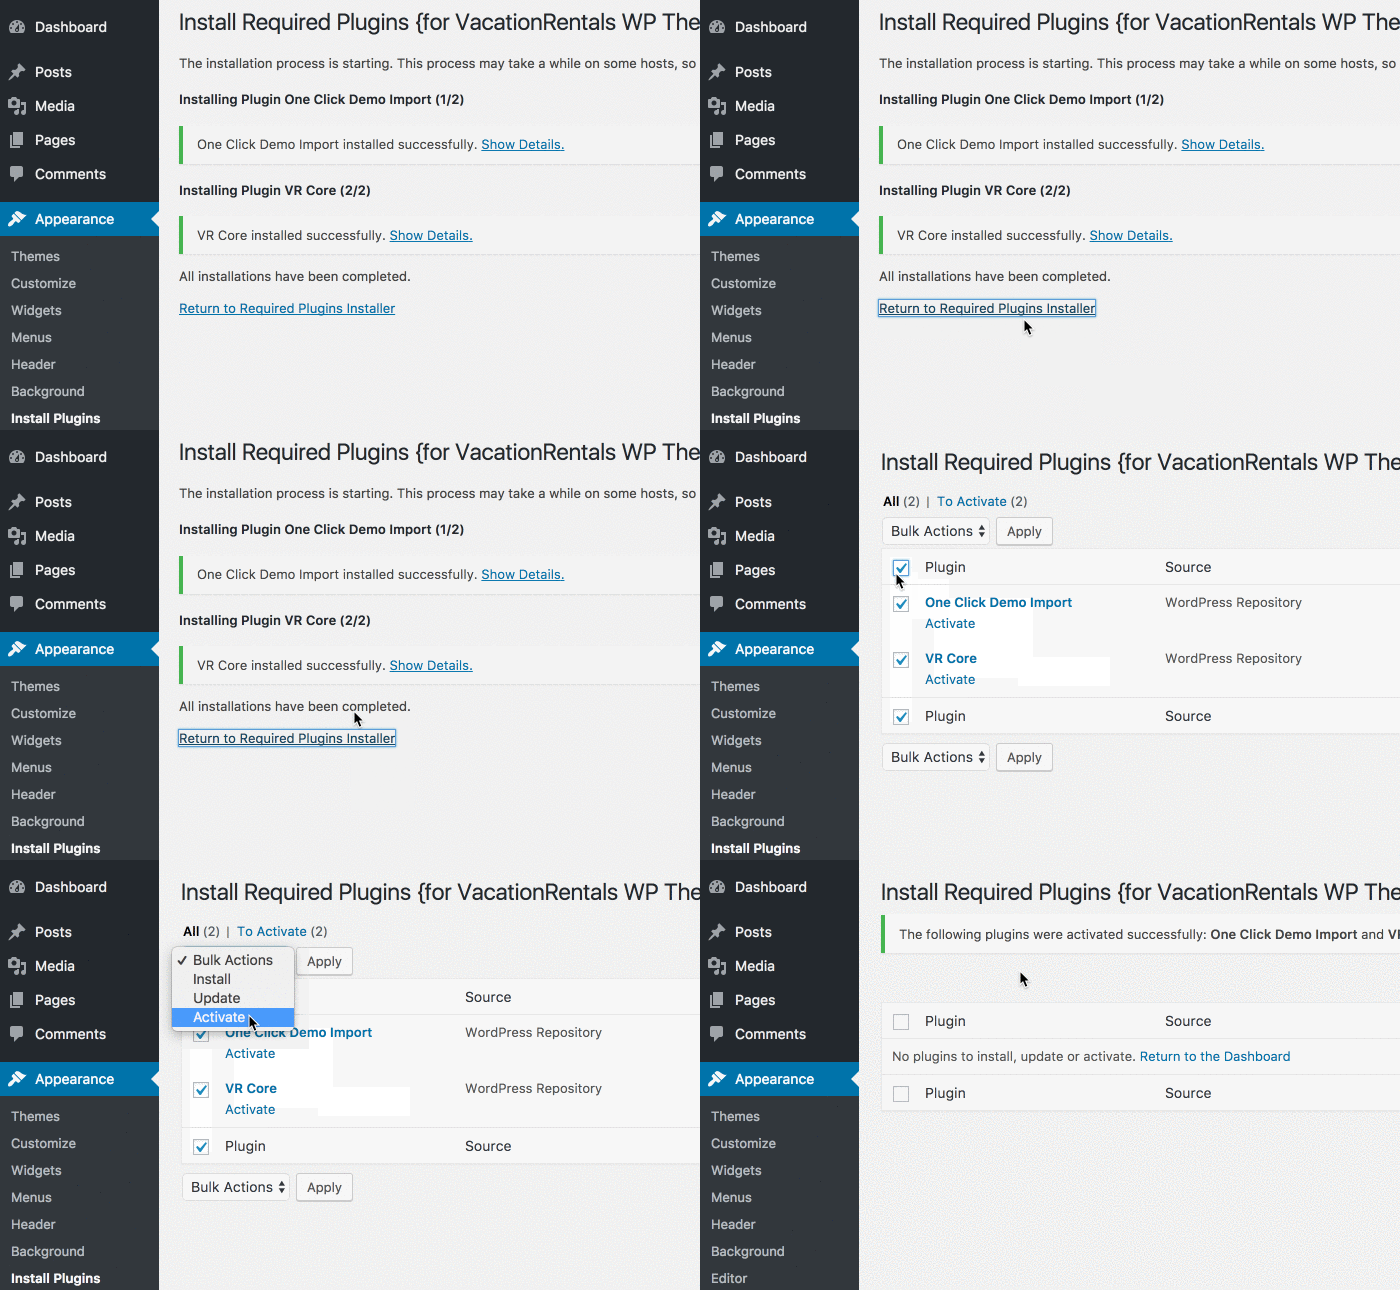
Return to required plugin installer, select Activate from the drop down and click Apply to activate these plugins. As shown in the GIF below.
Step #3— Import Demo Data
You can quickly setup the entire theme just as shown in the the theme demo by importing demo data. It's pretty easy. All you have to do is:

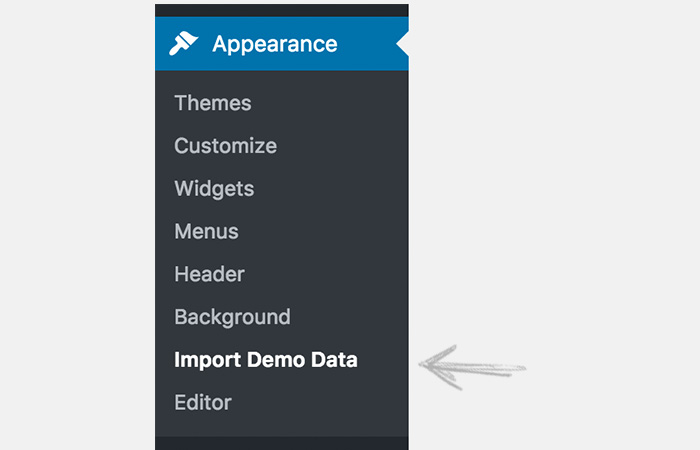
WordPress Admin dashboard > Appearance > Import Demo Data.

Yes Import!. It may take up to five minutes to import the data. You can go and have coffee while your site gets ready.
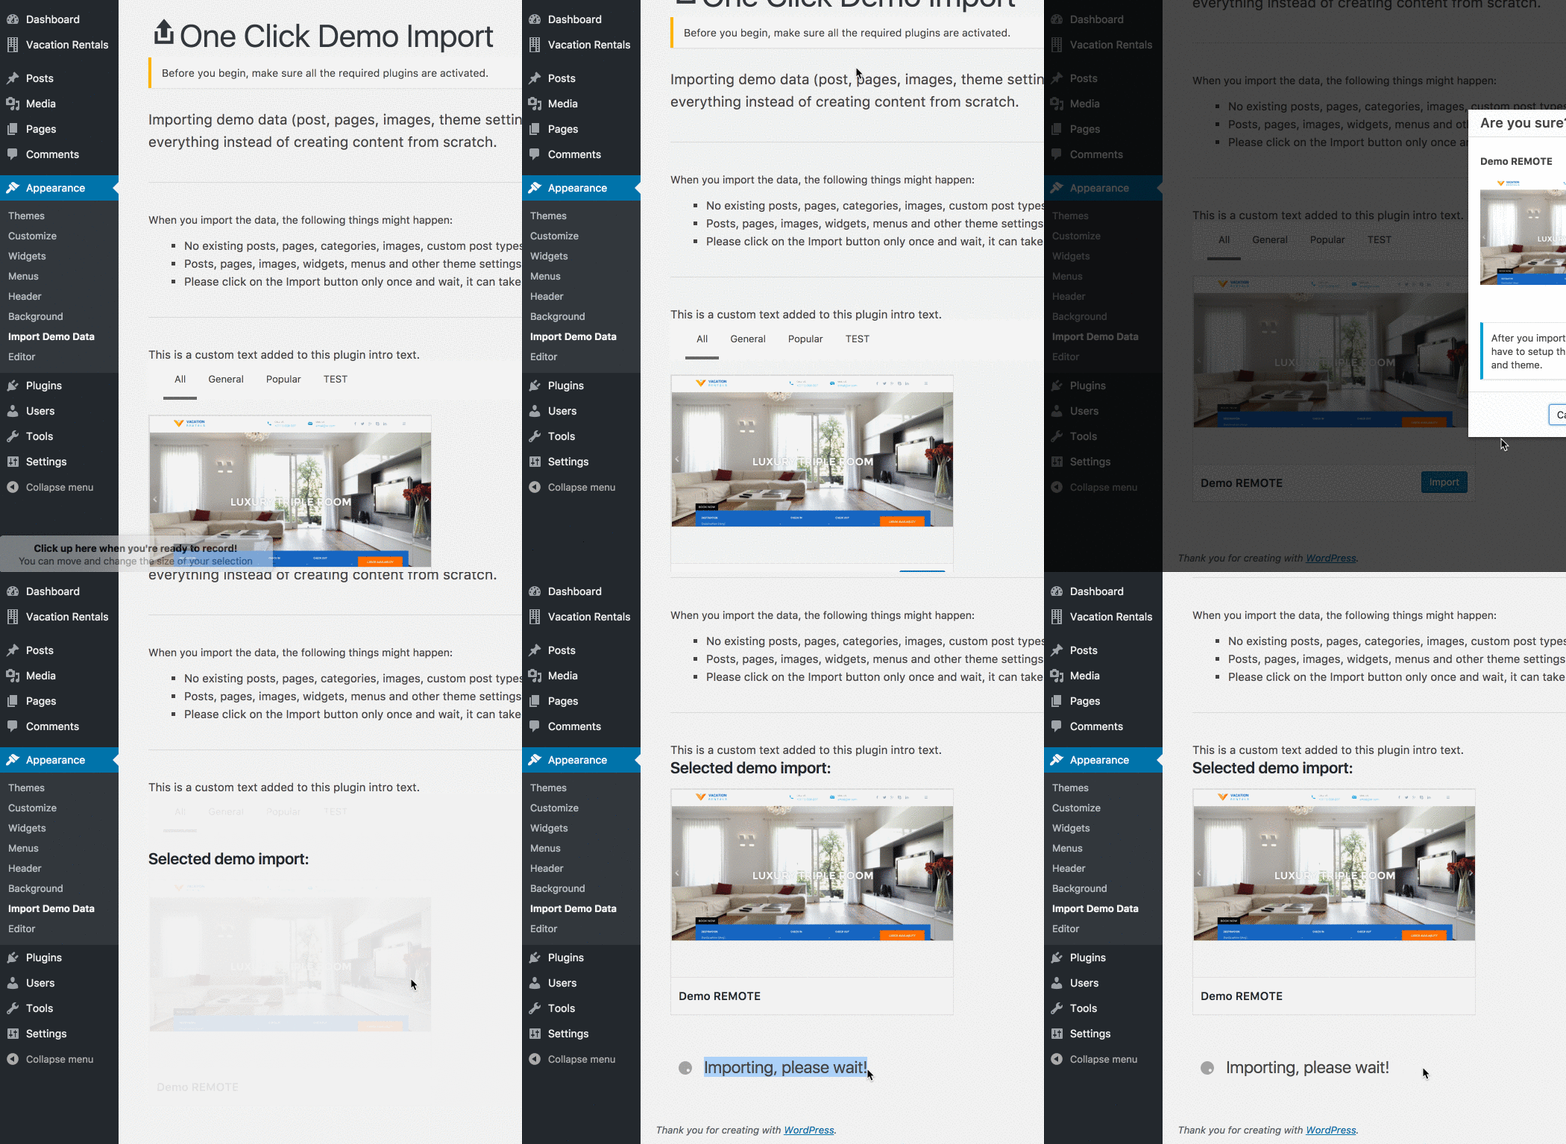

Appearance > Customize) your theme to your will!
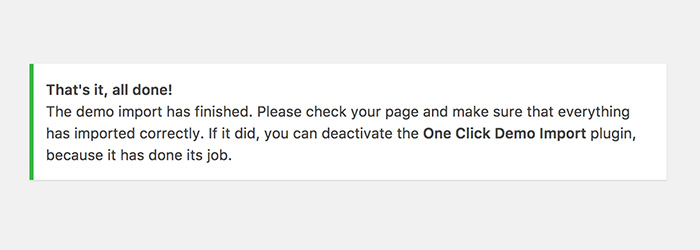
If you end up with some kind of error on this step, make sure you try once again. If that doesn't work, then send what you see as an error as a support ticket to us.
NOTE
Importing demoo data (post, pages, images, theme settings, ...) is the easiest way to setup your theme. It will allow you to quickly edit everything instead of creating content from scratch.